
Motion graphics templates make creating highly customized professional motion graphics for your video project easier and faster. In this article, we’ll go over how to customize motion graphic templates to fit your video production’s style and tone. We’ll start by defining a motion graphics template — or MoGRT. Then, we’ll dive into where to find and how to choose a good starting template for your project followed by how to customize it to suit your production.
What is a motion graphics template?
A MoGRT provides a shortcut to custom motion graphics. Think animated titles, lower thirds, transitions, graphic overlays and more. You’ll often hear these templates referred to as MoGRTs, named after the .mogrt file type. These templates are built in either Adobe After Effects or Adobe Premiere Pro and saved as a .mogrt file, allowing you to customize the MoGRT right inside Premiere Pro to match your production’s style and tone.
The benefits of using MoGRT files
The main benefit of using a MoGRT is that it saves time. MoGRT files allow you to access the power and flexibility of graphics created in After Effects without leaving the Premiere Pro interface. These templates are easy-to-customize and can be reused for related projects in the future. This means you can include advanced custom graphics in your productions without outsourcing — even if you don’t have the time or the skills to build those graphics from scratch.
Why customize your motion graphics template
While it’s possible to simply choose a motion graphics template and insert it directly into your project, this won’t give you the most polished results. The real power of MoGRTs lies in how easy they are to customize. Matching the template to the style and tone of your production will give you a more cohesive and effective final result.
For example, let’s say you’re a travel vlogger who just returned from a backpacking trip in the Sierra Nevada. You’ve got tons of stunning footage from your trek through the rugged mountain range, but now all you need is a title screen that’s inviting and personal while keeping the focus on the landscape. You decide you’d like something handwritten with an understated, vintage feel.
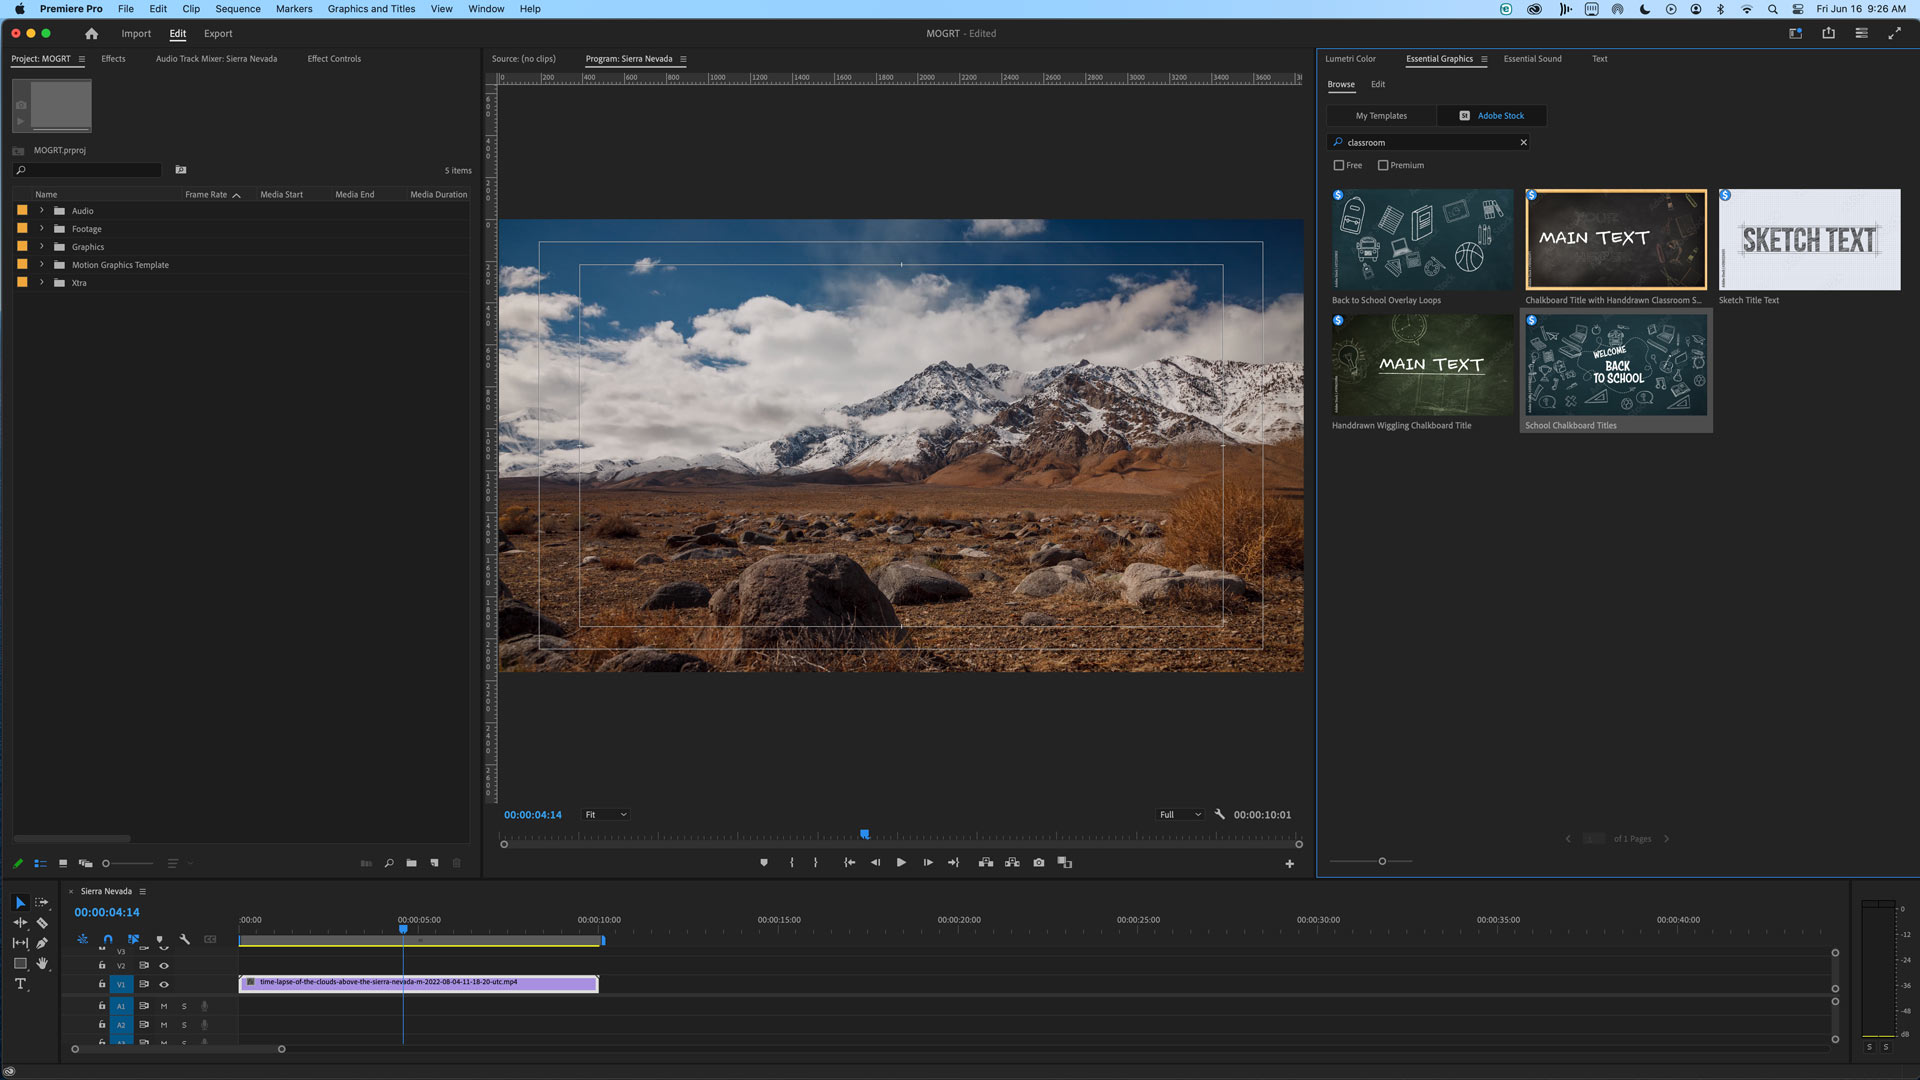
Here’s another example: You’re a professor of geology who wants to make an engaging video about rocks for your students. While you find the subject fascinating, you know that passing that excitement on to your students can be a challenge. That’s why you want a lively motion graphics title that promises to make learning fun – like doodles on a chalkboard.
As you’ll see, even though these two videos have different purposes, it’s possible for both video producers to choose the same motion graphics template as a starting point. With the ability to customize MoGRTs directly in Premiere Pro, each project can still look unique.
Let’s take a closer look at how each of these projects might use MoGRTs to create custom motion graphics that perfectly support the production’s style and tone.
Finding and adding a good starting template
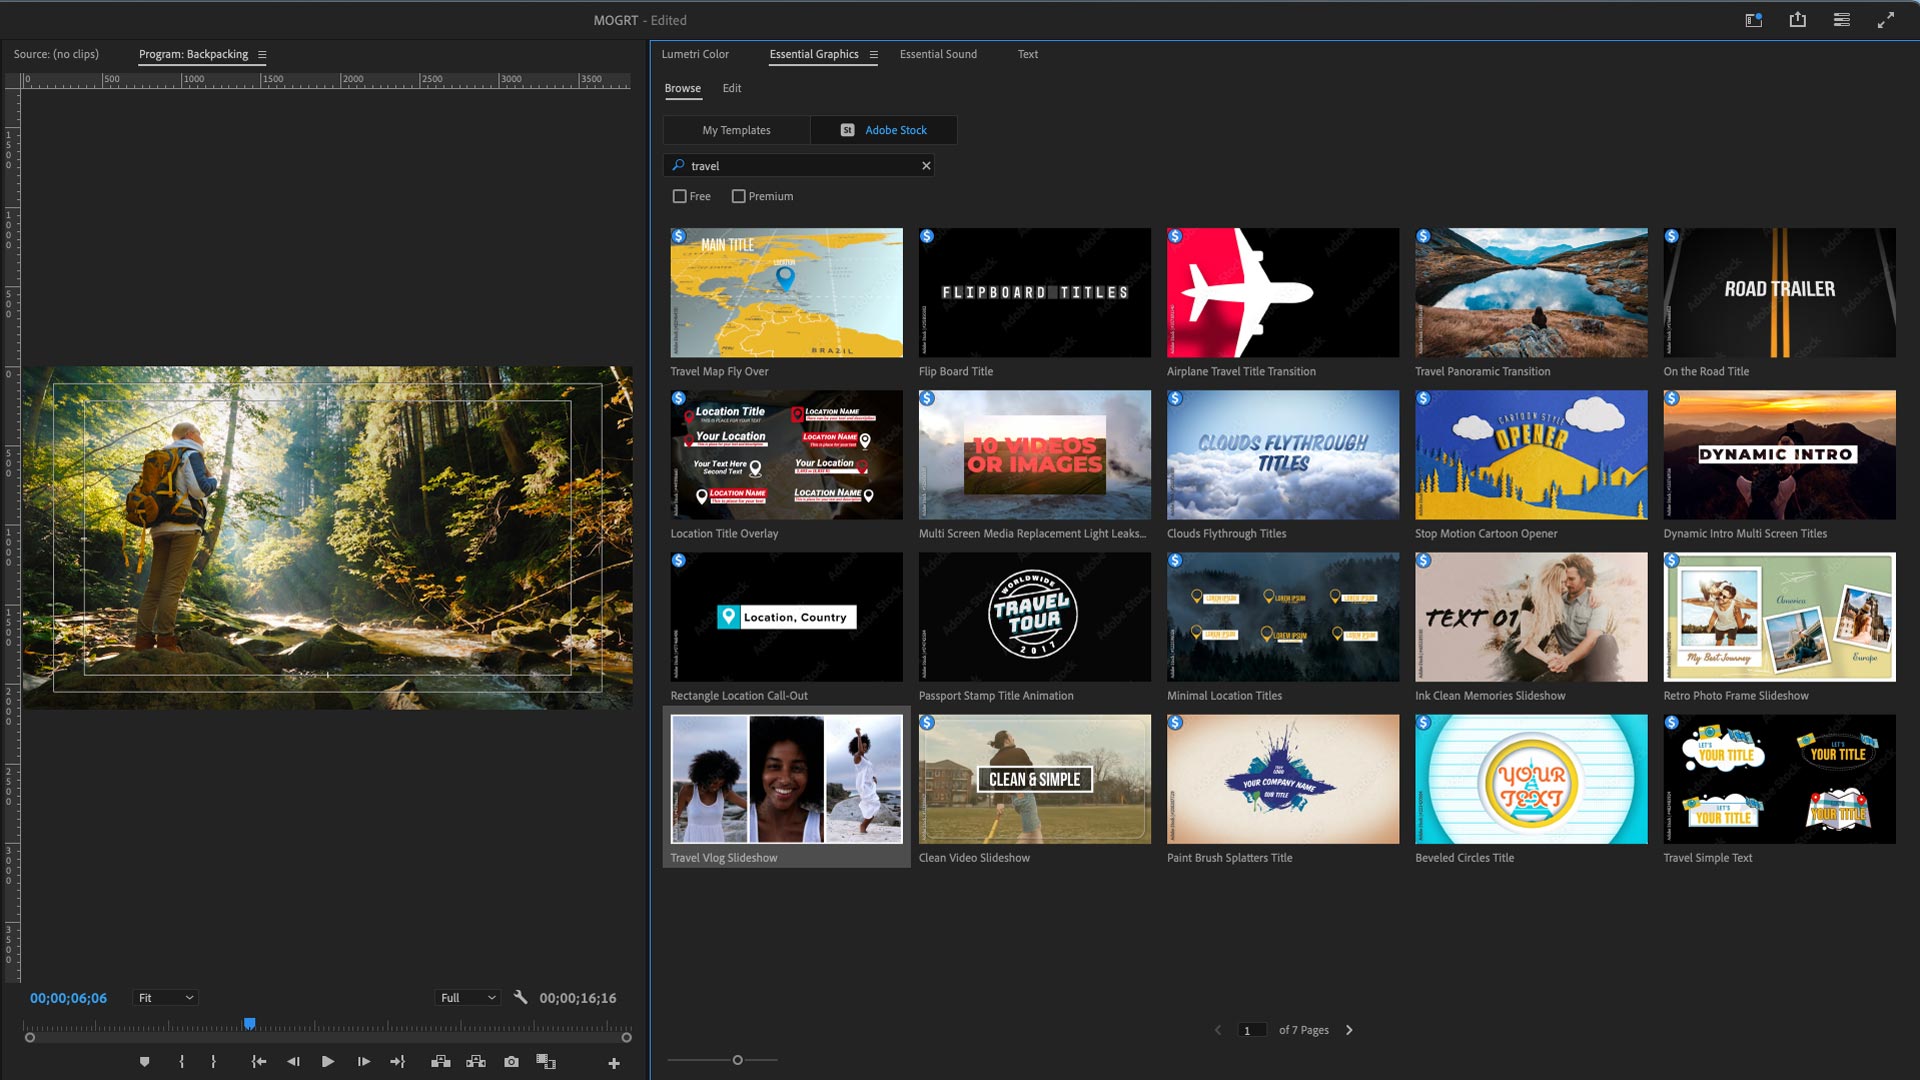
The first step in adding a customizable motion graphics template to your video editing project is finding the MoGRT you want to use. You can do this inside Premiere Pro; simply navigate to the Essential Graphics panel to get started. If the Essential Graphic panel isn’t open already, just go to Window > Essential Graphics to bring it up.
In the Essential Graphics panel under My Templates, you’ll find a number of built-in MoGRTs ready to go. If you don’t find what you need in this collection, Adobe Stock offers a wide selection of free and paid motion graphics templates. Just switch to the Adobe Stock tab to browse your options. Or, you can find MoGRTs on third-party stock marketplaces.
If you’re feeling ambitious, you can also create your own template in After Effects or Premiere Pro. This gives you full control over the look of your template; it’s a great option if you plan to make a series of videos all using the same motion graphics package.
What to look for
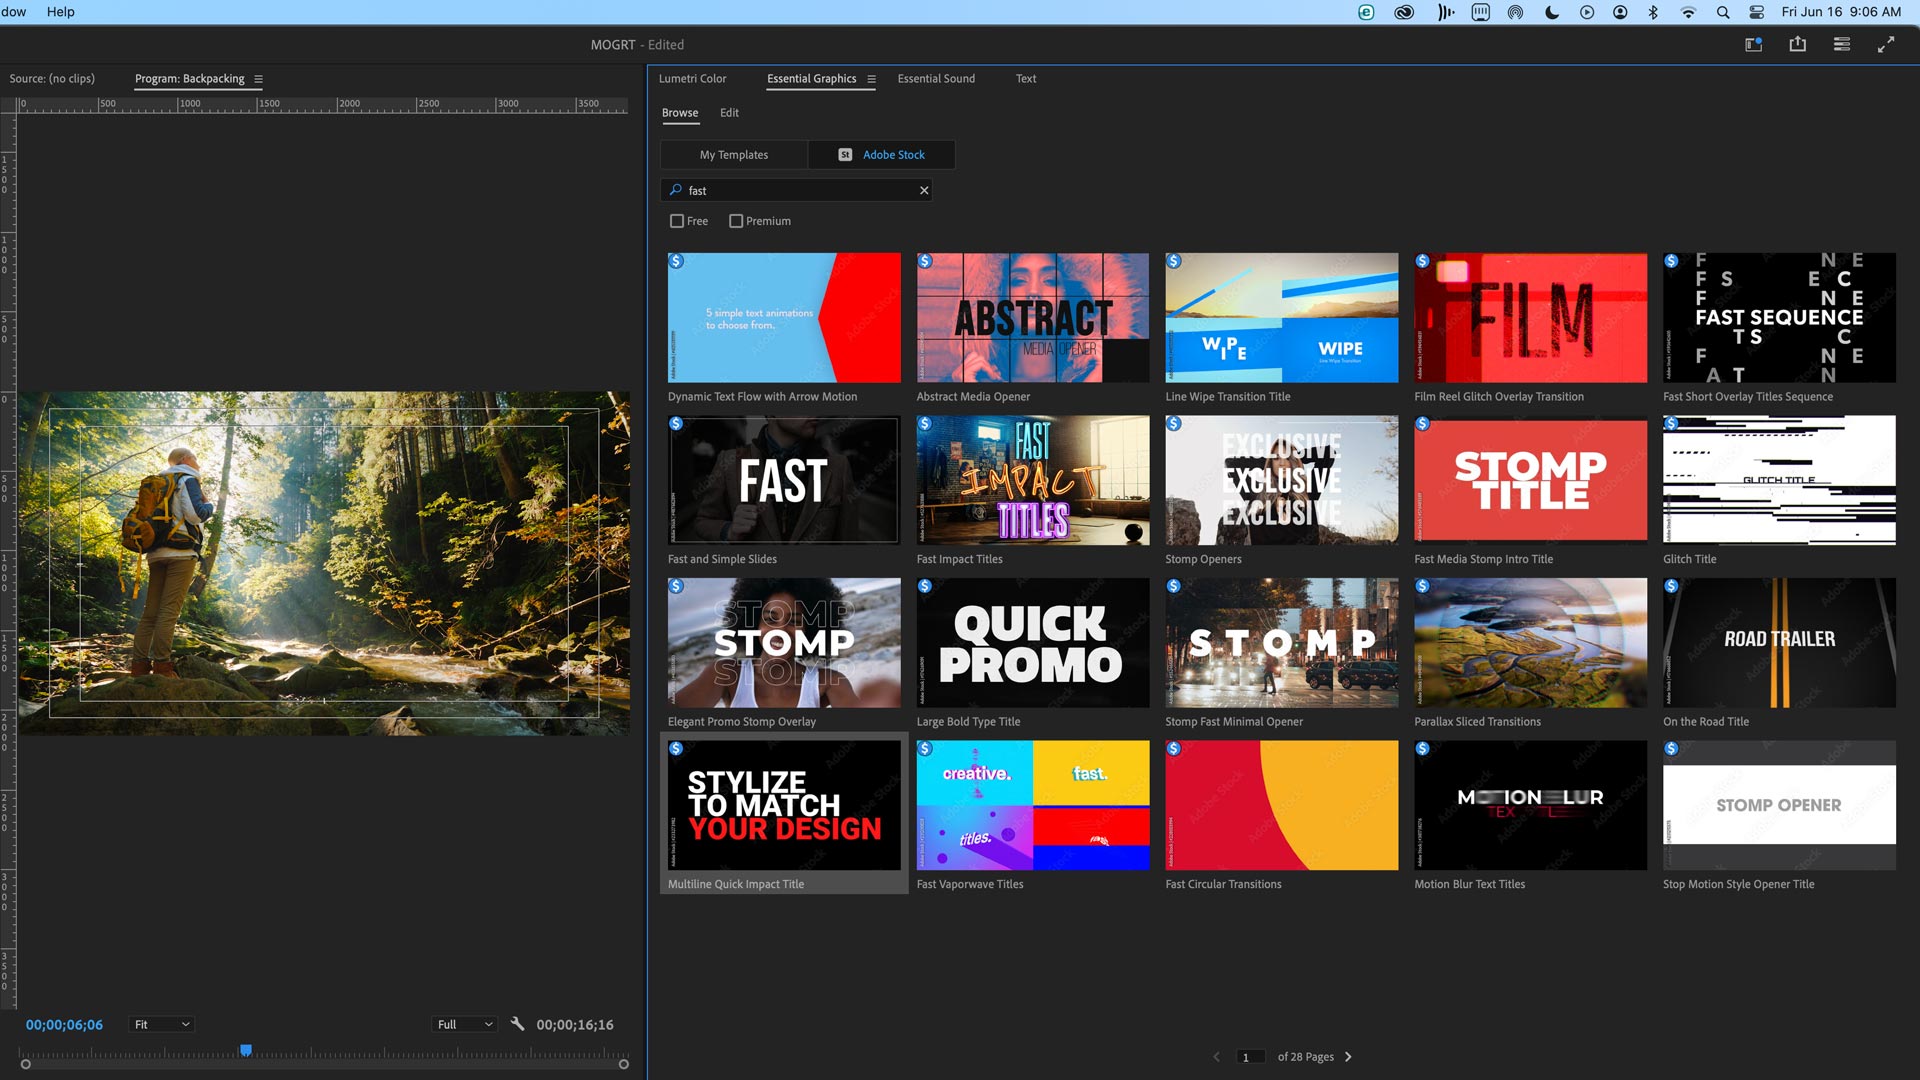
As you browse for a suitable MoGRT, look for options that get you as close to the desired end result as possible. First, think about how you want the final graphics to look and feel. Try to come up with keywords that can help you find relevant motion graphics templates. It might be tempting for our travel vlogger to search for MoGRTs with terms like “travel” or “adventure,” and the geology professor might choose terms like “education” or “science.” However, you’ll have better luck using more abstract terms like “fast,” “dynamic,” “cinematic” or “vintage” to find templates in the specific style you’re after. You’ll get many more options to choose from, and you’ll still be able to customize the details to your use case.
Once you’ve narrowed down your options, think about what elements you want to customize. Customization options vary by template, so check the template info to ensure all the options you need are available before committing. Check the template resolution, as well, to make sure it matches the output resolution of your video project.
How to customize a MoGRT
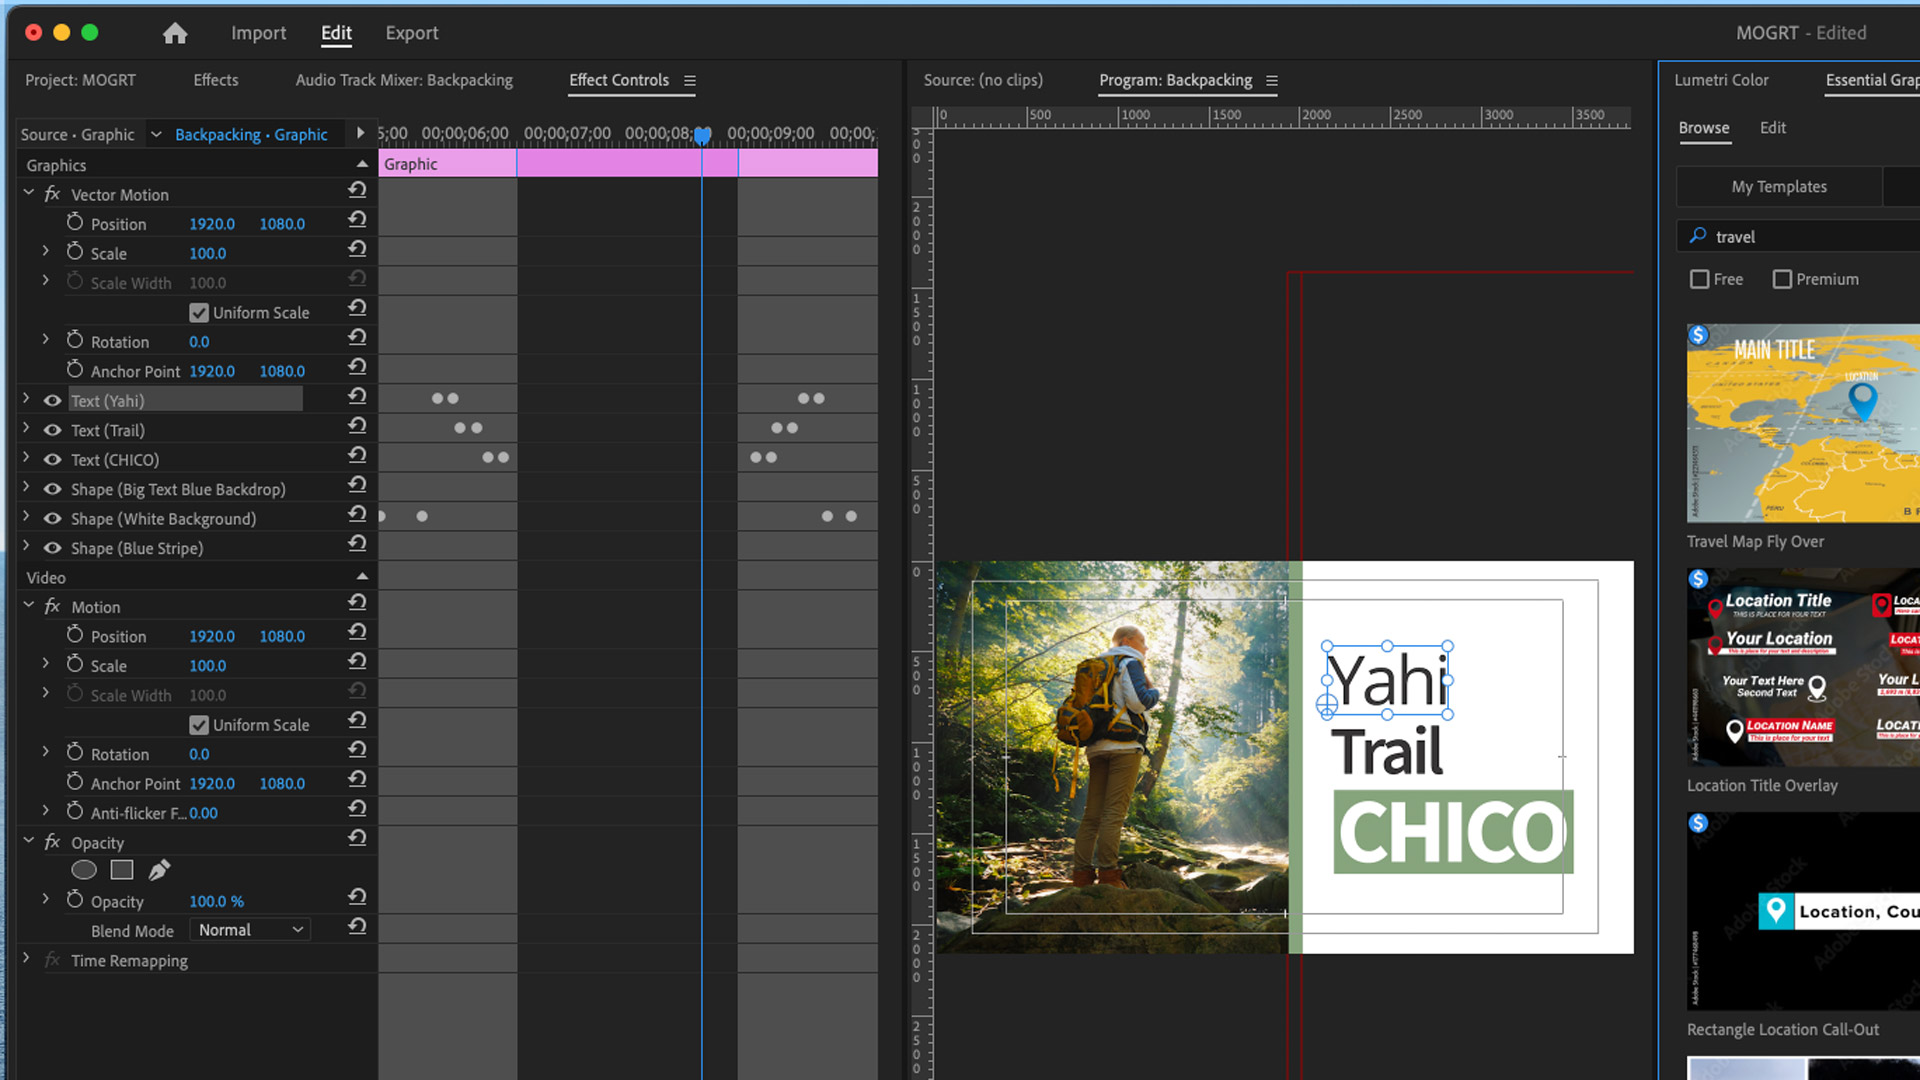
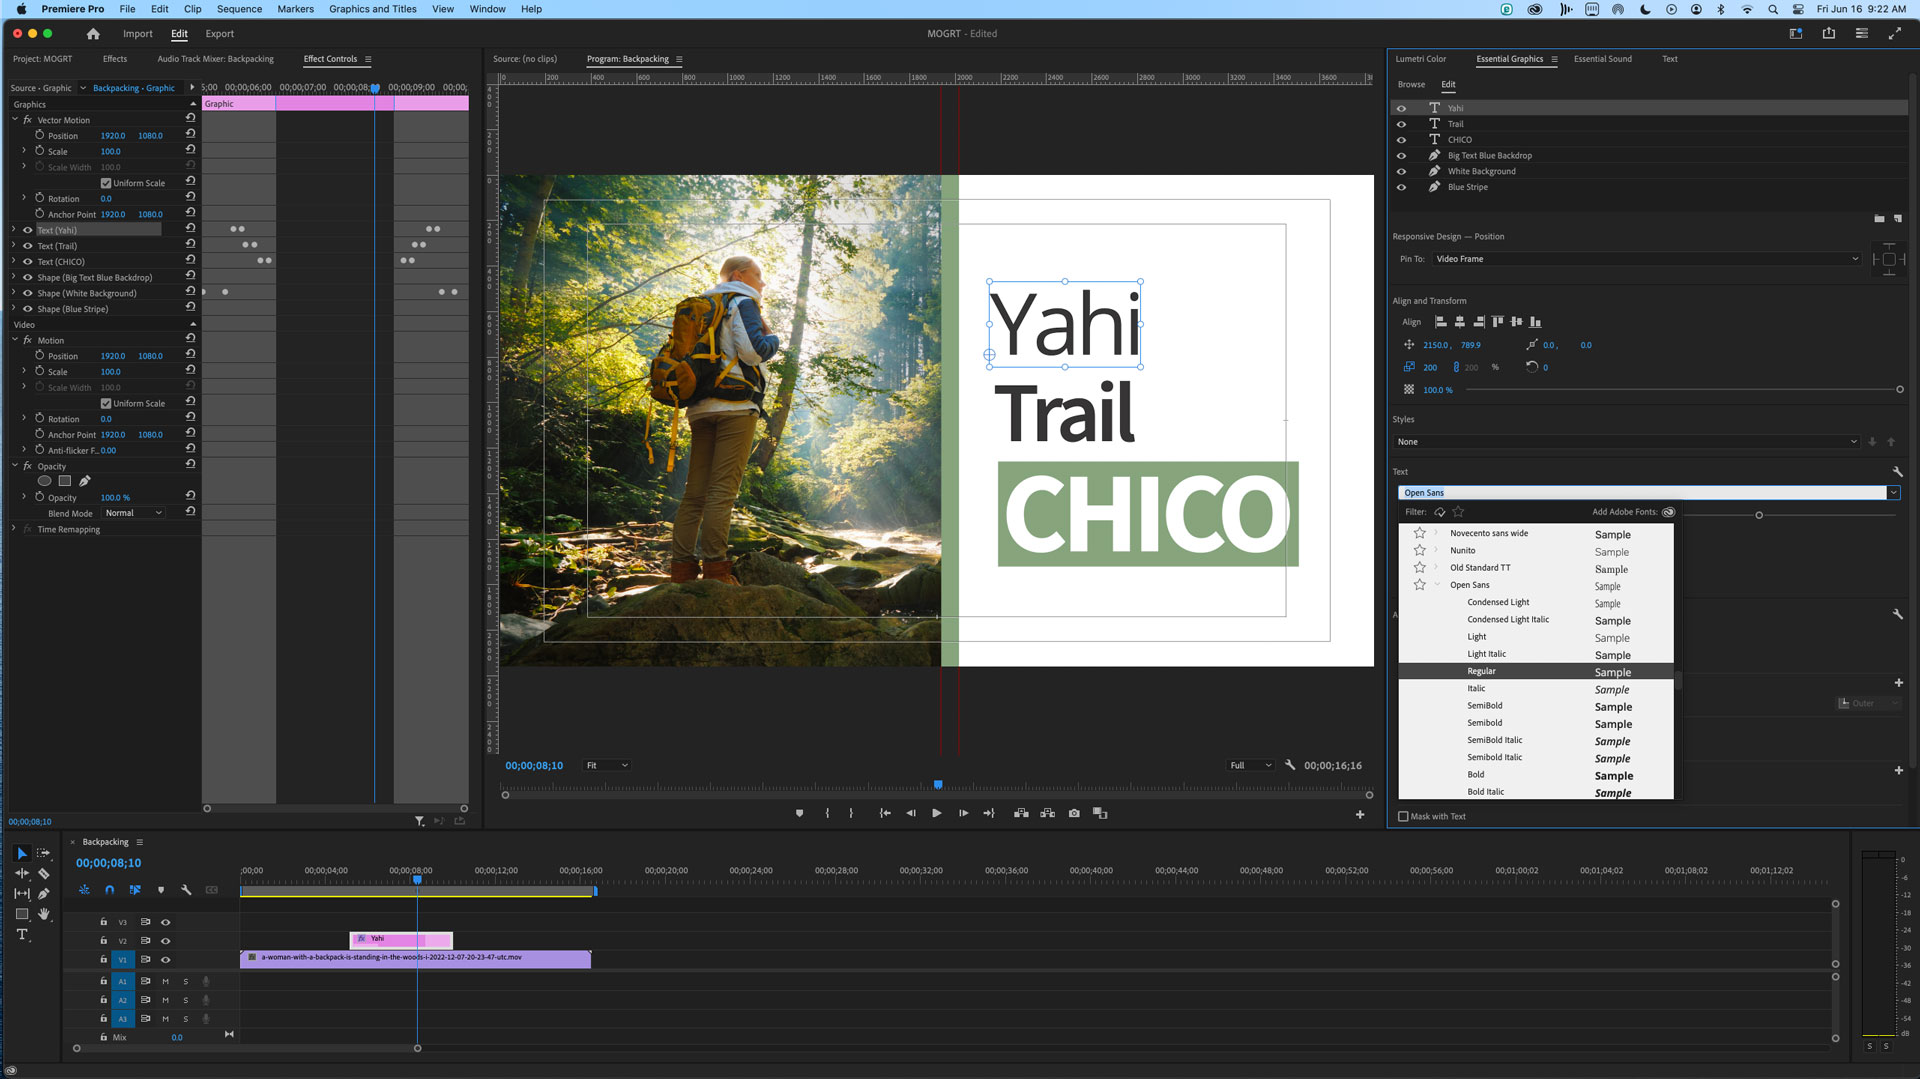
Once you have selected a template for your project, you can access its customization options directly in Premier Pro in the Edit tab of the Essential Graphics panel. Depending on the template, you can customize a template’s text layers, graphic elements, animations, media and more.
You’ll almost certainly want to change the text layer’s content to match your video’s content. However, you may also want to change the text color, size or font to better match your production. When it comes to graphic elements and animations, you may need to adjust the speed at which a block slides into the frame or change the color and size of an element so that it stands out against a video background.
Adjusting each element in Premiere Pro
Let’s dive into the specifics of customizing a motion graphics template using the free Vintage Handwritten Title MoGRT from Adobe Stock. It’s a relatively simple full-screen title graphic with an animated write-on effect and fun doodles that pop in and out to give it some extra character.
First, we’ll license and download the template by clicking on the cloud icon under the template we want to use. The template will then appear in the My Templates tab of the Essential Graphics panel. From there, we can simply drag and drop the template onto our timeline. Double-clicking on the newly inserted graphic will open the Essential Graphics Edit tab, which reveals our customization options.
Customize your text
In this particular template, we have the top and bottom text controls, plus options to adjust the frame, underline, doodles and background. The first step, of course, is changing the placeholder text to your desired title. Then, you can adjust the text color, text size and text spacing amount for both the top and bottom lines of text.
Customize the graphic elements
This template also allows you to choose between a rectangular or elliptical frame border. You can also adjust the frame opacity, color, width, height and stroke width, as well as how much it wiggles. Similar controls are available for the template’s other graphic elements, like the underline that divides top and bottom text and the doodle decorations. You can also change the background color and opacity as well as the opacity of the template’s noise layer.
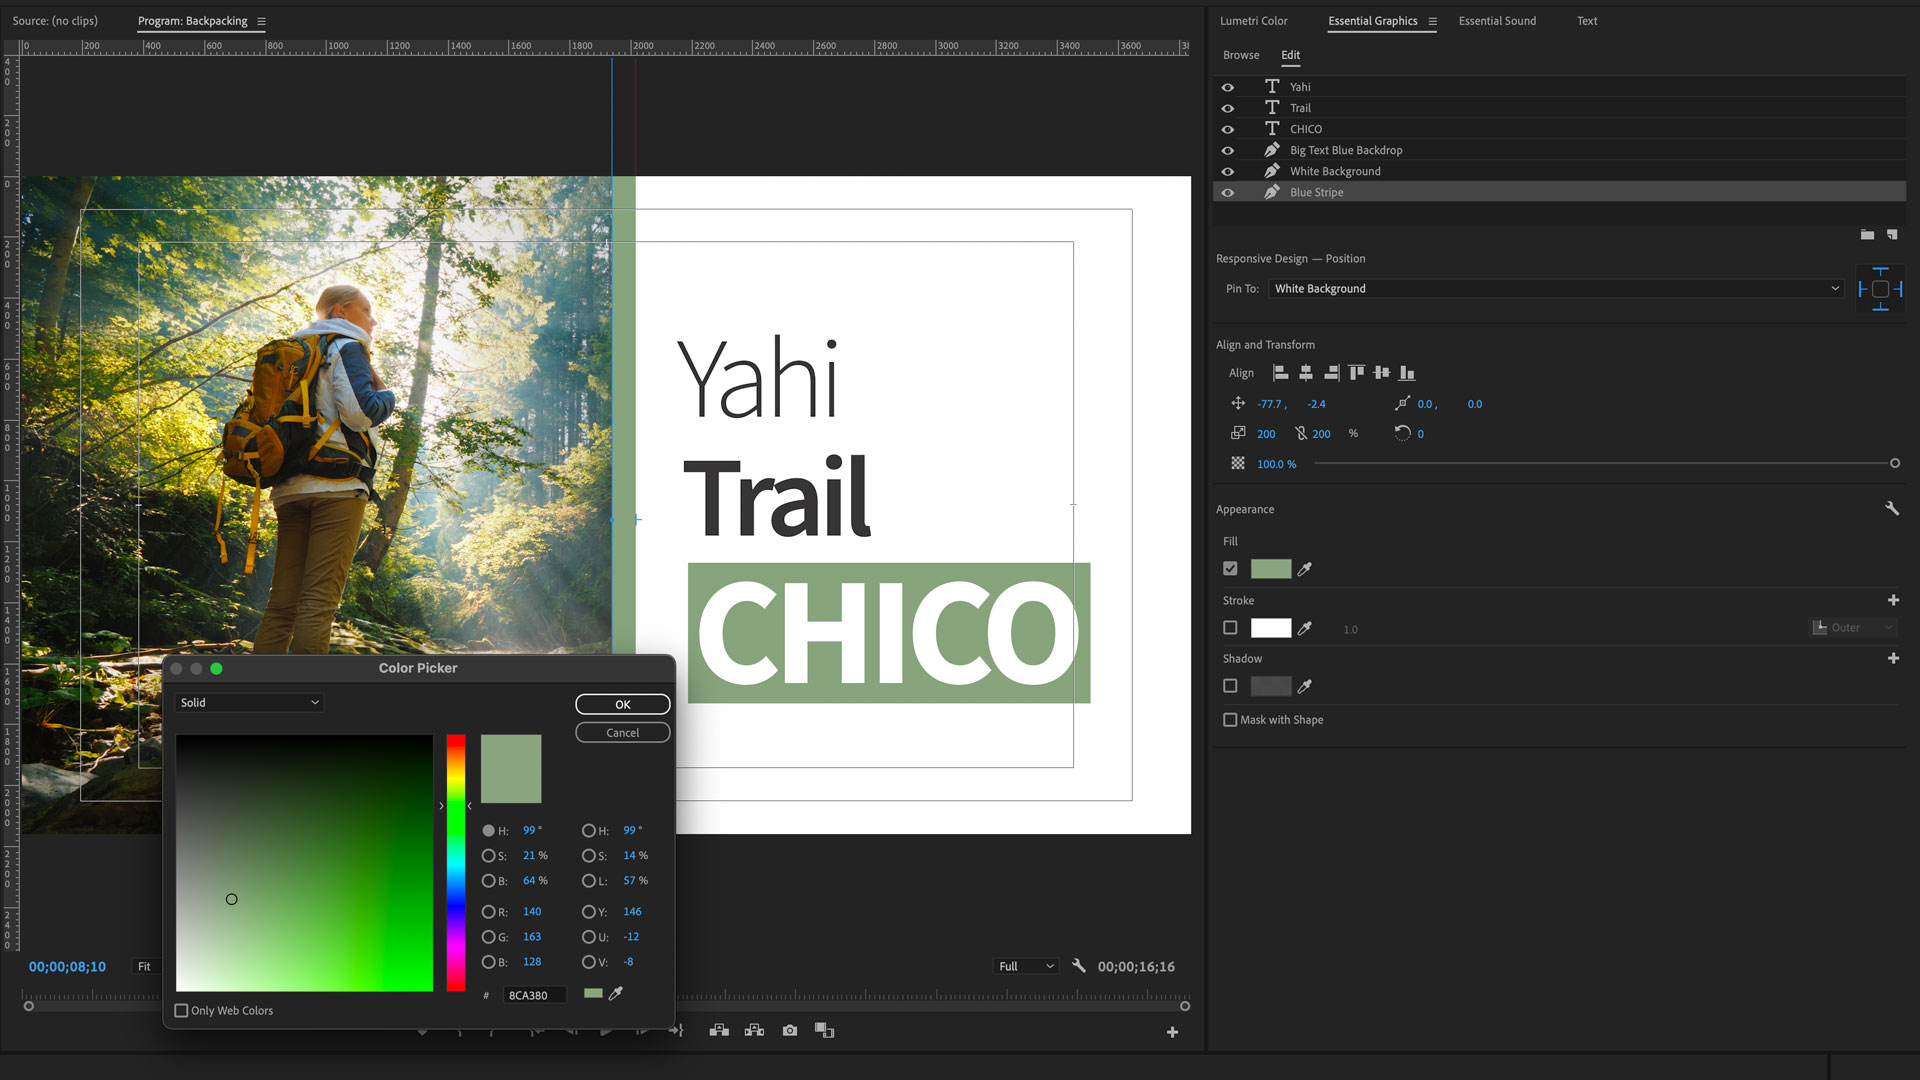
Aside from the color selection, which uses a color picker, each element is controlled with a simple slider, making it easy to adjust each element as needed.
One template, two productions
Though our Vintage Handwritten Title template doesn’t include all the fancy controls you might find in other templates — font choice, color pallet, scale, duration, animation options, group controls, spreadsheet data controls, replaceable media, etc. — it’s still possible to customize this MoGRT to match our production’s style and tone.
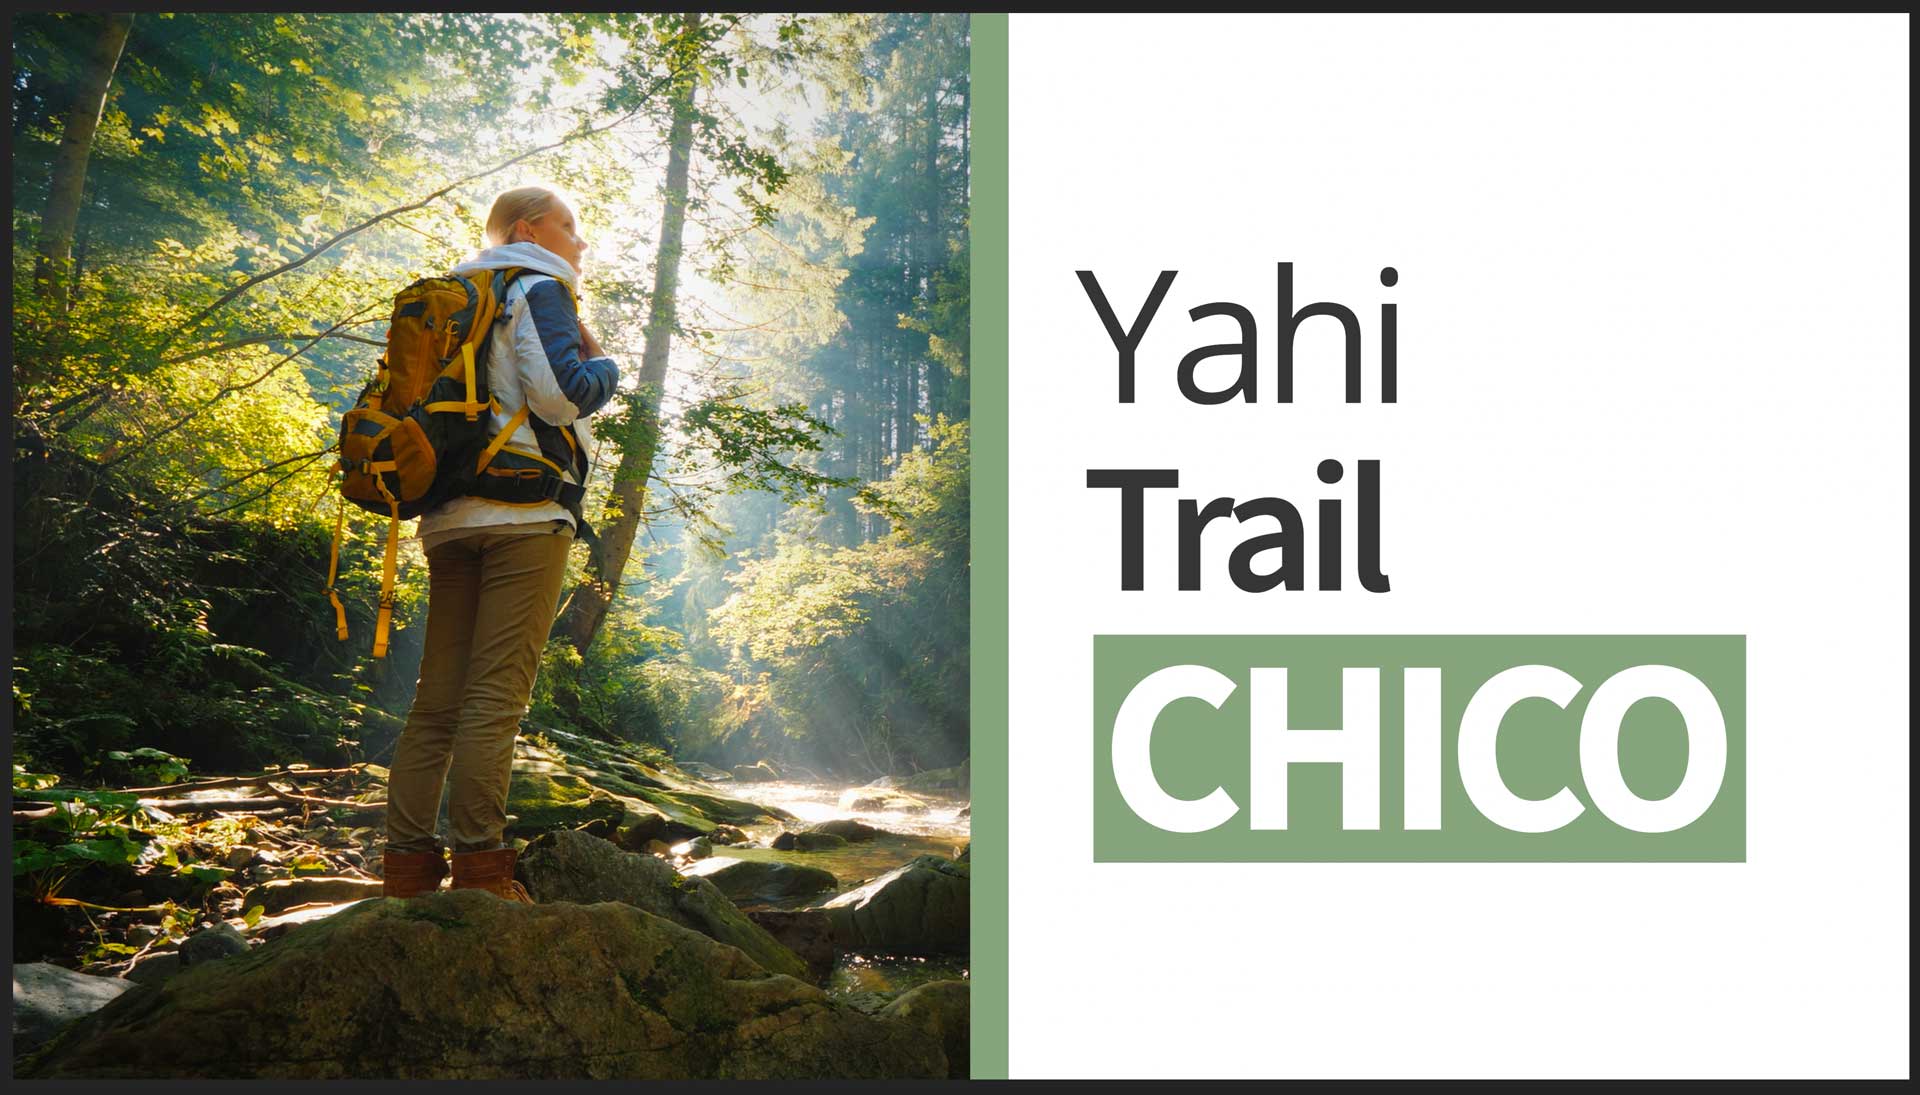
For our travel vlog, we’ll choose a lovely sage green color for the text and graphic elements. This will complement the forested landscape featured in the video. If we want to highlight a particularly scenic vista in the opening titles of our travel vlog, we can make the decorative frame thinner, minimize the wiggle animation and set the doodle, background and noise opacity to zero so that the handwritten text appears directly on top of our clip.
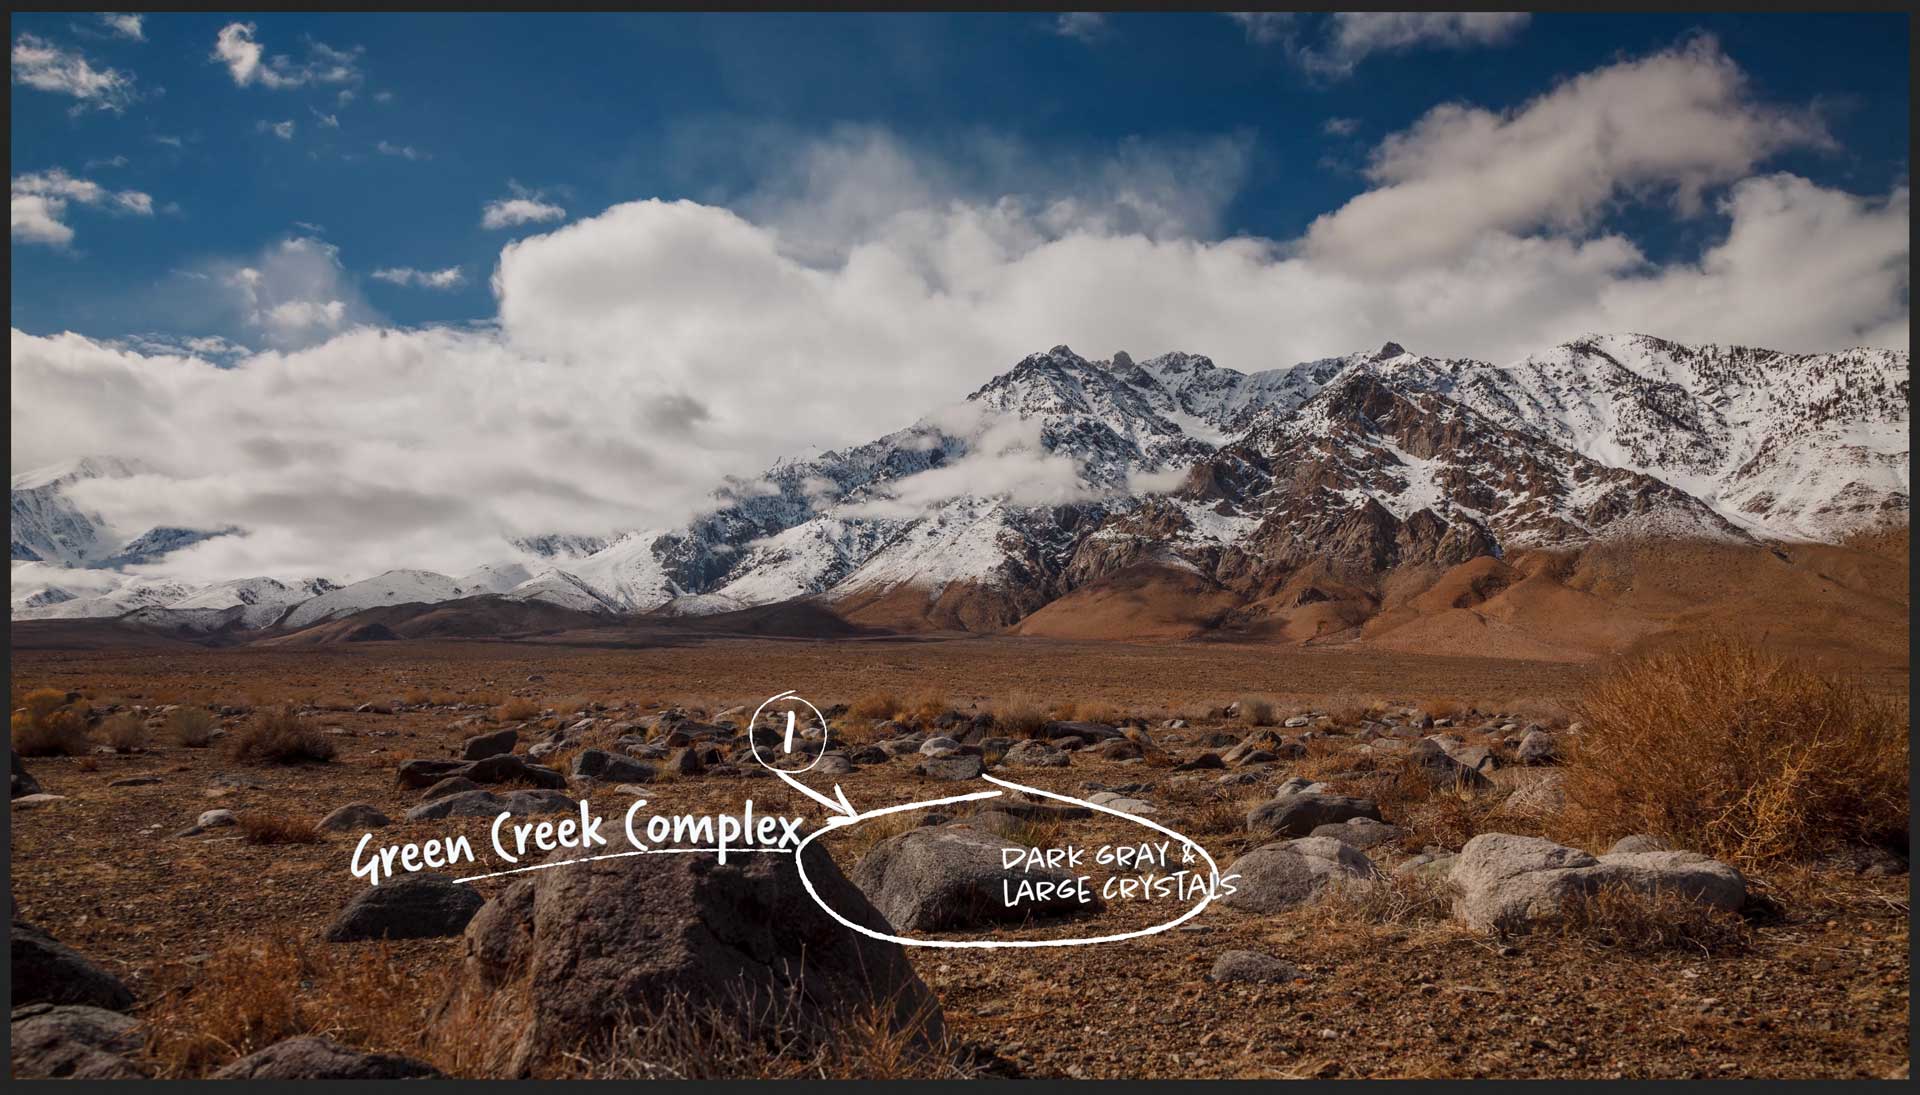
For the geology video, we want to emphasize the chalkboard look to evoke the feeling of a classroom, so we’ll shift the colors just slightly to a chalky off-white. Then, we’ll lean into the animated chalkboard look with a thick elliptical frame and lots of wiggly doodles.
Final thoughts
We can see through these examples how easy it is to customize MoGRTs to craft unique custom graphics for your video. Even simple adjustments to color and scale go a long way in supporting the style and tone of the video. As you craft your next video, experiment with customizing a motion graphics template to match and enhance your production. To learn more about motion graphics templates, visit stock.adobe.com.


